Showing posts with label avi{at}or. Show all posts

Thursday, May 1, 2014

AVI@TOR MK5 SP1

So the plane flew, lessons were learned and improvements were made.

All of the control surfaces were physically set to the appropriate neutral position, so the next launch can start with zero trim.

The speed regulator was moved to the outside for extra cooling since the motor was cut out a couple of times due to overheating.

The plane was colored in neon colors for easier viewing.

And everything was packed in a portable package, which can be put together in 5 minutes.

The final result:


Monday, March 31, 2014

AVI@TOR MK5

Well, the platform works. The plane flies, the phone steers it, camera takes pictures and software process it. Now, let's tie it all together, and while we're at it, let's upgrade some parts too.

Current limitations to overcome: increase flight time (larger batteries), eliminate the need for a runway and easier transport and assembly. The answer, a bigger and better plane.

Introducing Avi@tor MK5, a Hobbyking EPP-FPV frame with some custom modifications. A pusher plane with the engine on the back that doesn't need landing gear to raise the propeller from the ground, which means it can land anywhere. With a wingspan of 1.8 m it can carry a larger payload, in our case more batteries. To improve it we raised the horizontal stabilizer for easier landings in tall grass. We also improved the strength of the frame by covering it with sturdy canvas soaked in cyanoacrylate glue (poor mans carbon fiber) to better withstand increased weight and rough landings. And designed a wing holding and attaching piece also out of canvas soaked in cyanoacrylate glue to replace stock mounting with rubber bands for increased durability.

The build:


What came in the box (with some tools for the operation prepared in the background). First thing to do, reinforce the horizontal stabilizer with a spare carbon fiber rod.


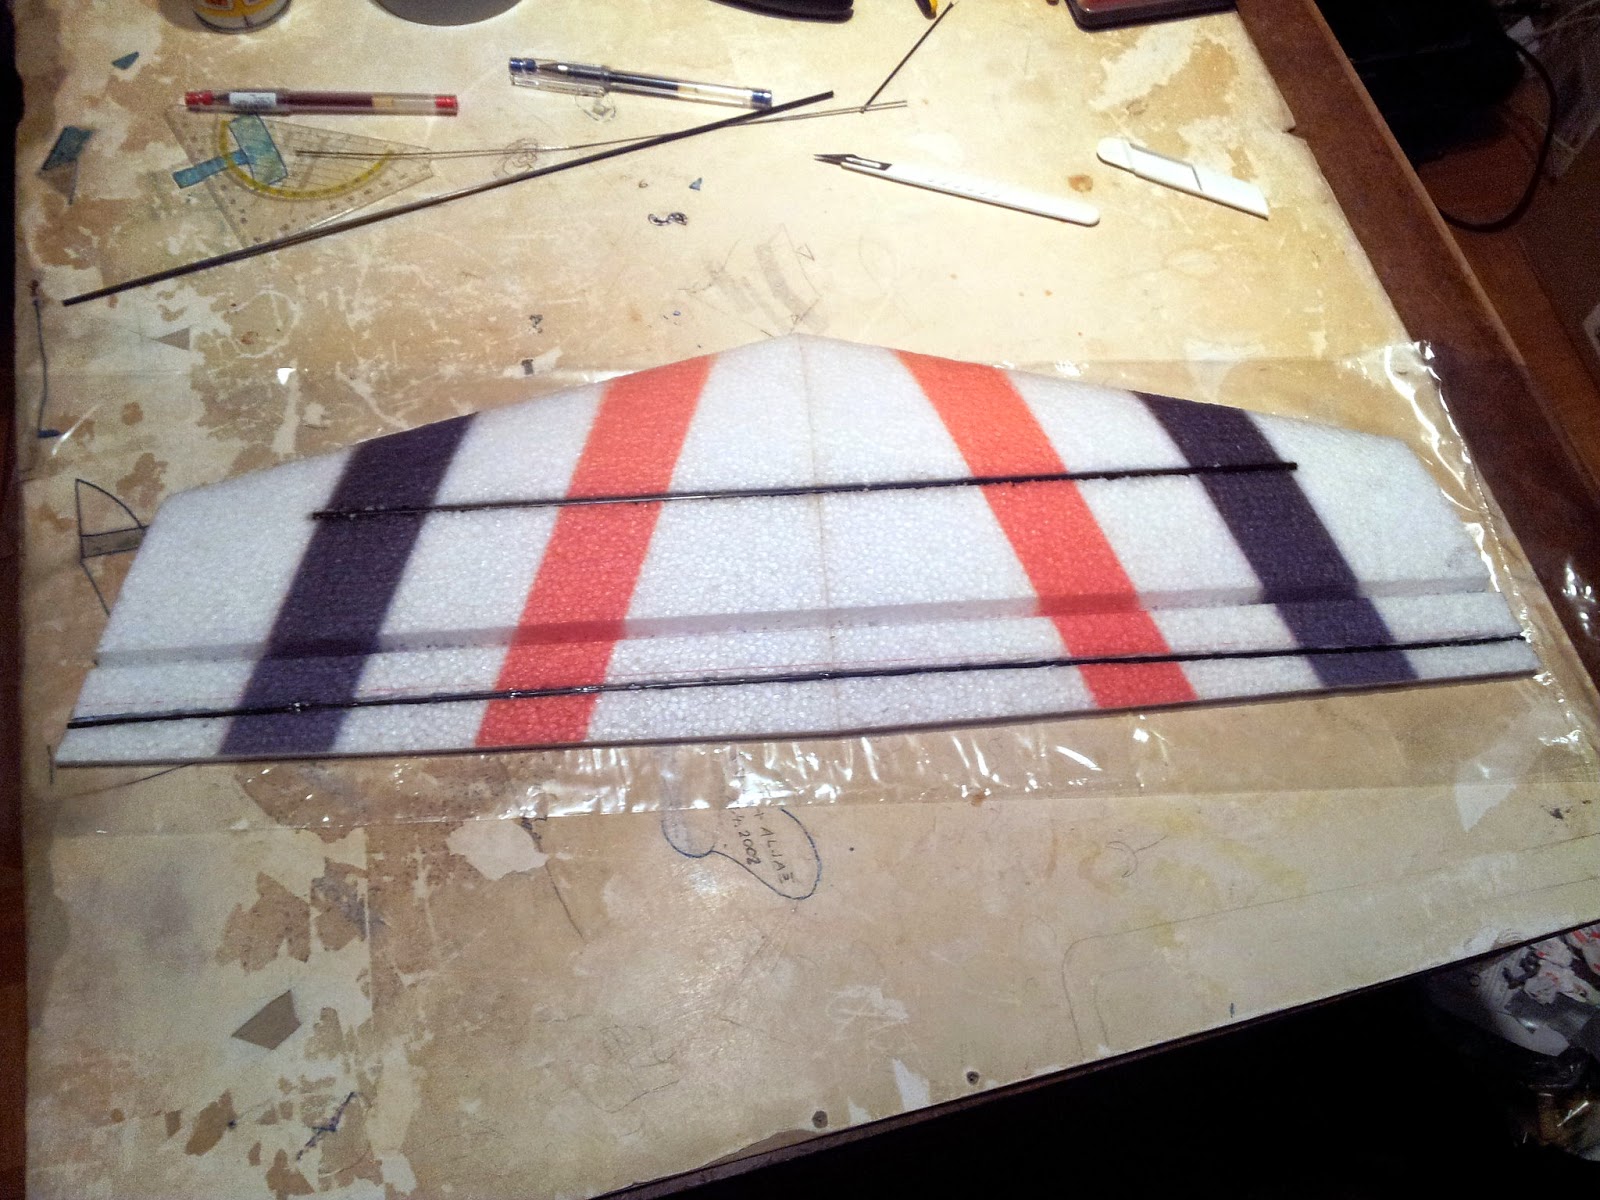
Next alight the wings, wrap them in clear film, cut a piece of canvas to size, align again and start soaking in glue.


Cut off and recess the the wooden support for the wing mount so it's flush with the fuselage (it'll make sense later).


Extend & expand the obviously too small vertical stabilizer and reinforce it with another spare carbon fiber rod trough the middle. Secure it to the horizontal stabilizer.


 Fortify the bottom of the fuselage with the canvas soaked in cyanoacrylate glue combo.


Remove the canvas soaked cyanoacrylate glue mold from the wings, alight it with the fuselage and add more canvas against it. This will make for the reinforced wing assembly that could be easily assembled.


 Cut out, align & glue some wooden support pieces that will hold the wing assembly together.


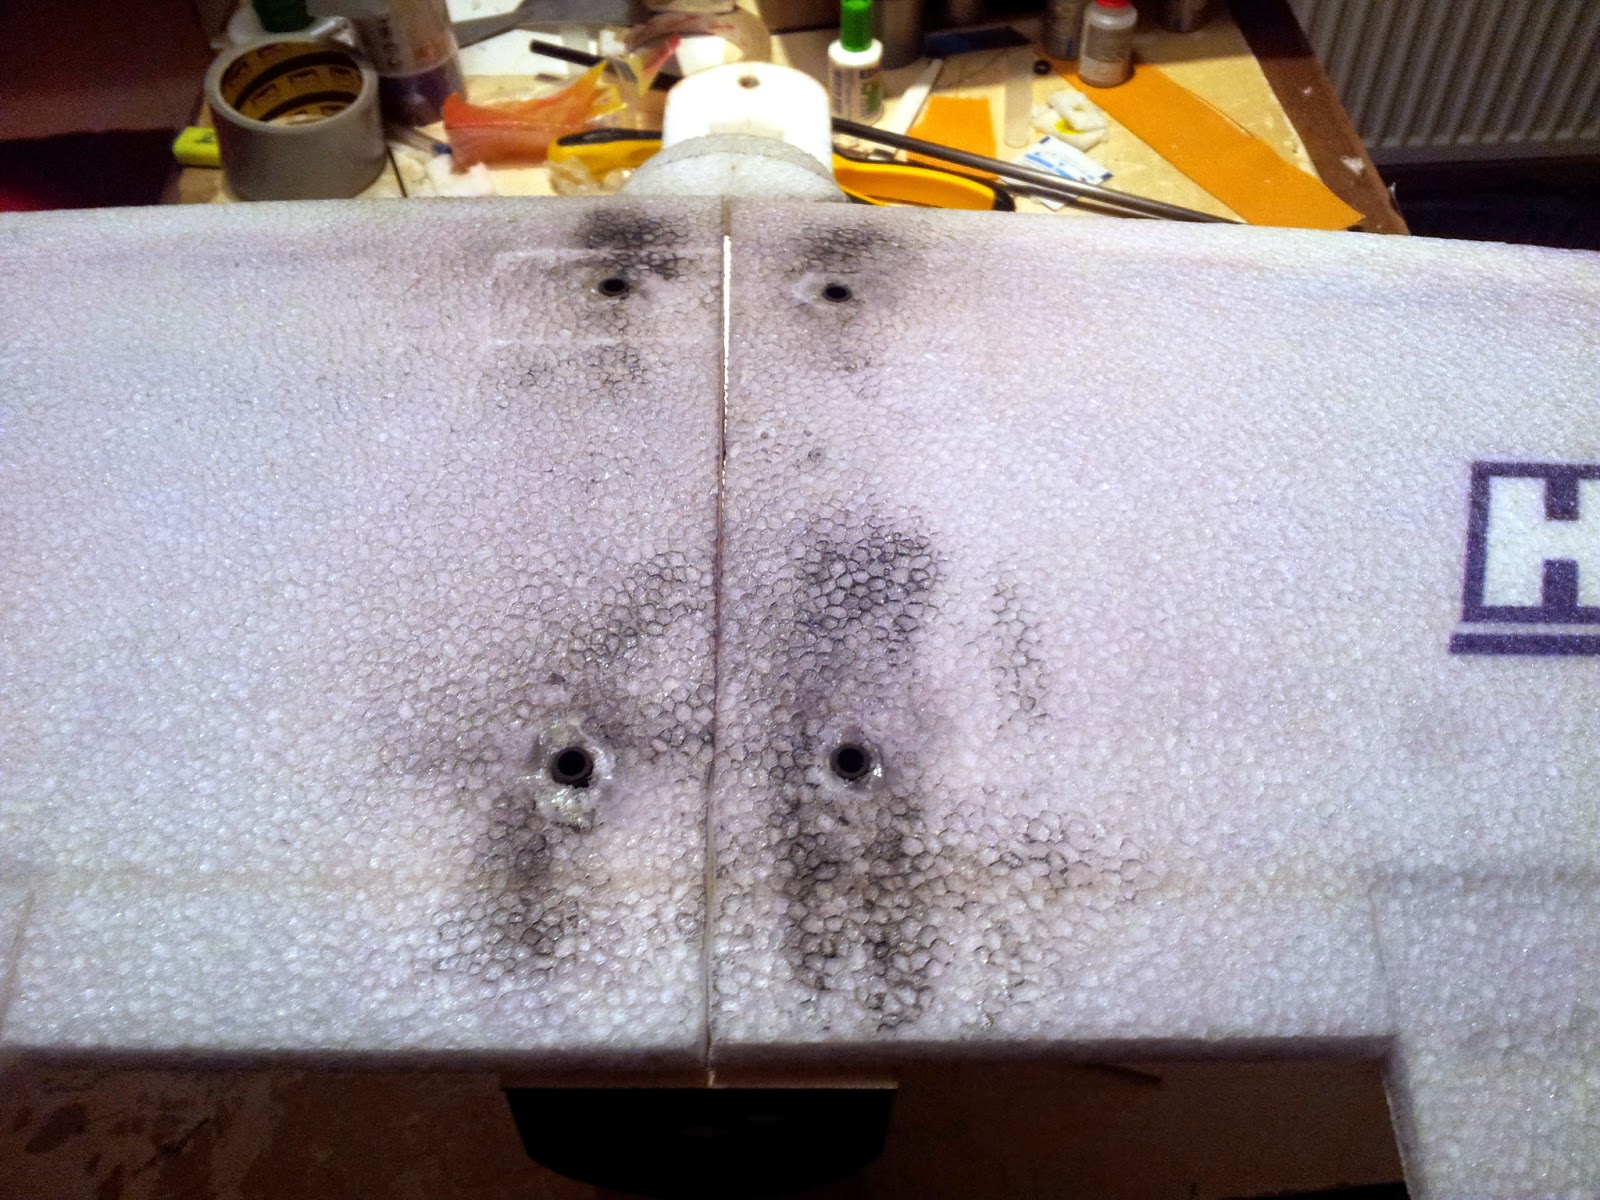
Drill and glue support carbon fiber beams in to the fuselage, also to help hold the wing assembly together.


Also drill the corresponding holes in to the wings and reinforce them with some more wood.


Fill the holes to size with cyanoacrylate glue, using clear film to wrap the carbon fiber beams as molds.


Once dried, cut and sand the beams to the exact size of the wings.


 Fit everything once more just to be sure, then glue in the tail boom.


Extend the leads of some high quality servos, wrap them in duct tape (just in case they are ever to be reused in the distant future when the plane spontaneously catches fire), and glue them firmly into the horizontal stabilizer.


Run the wires across the height of the vertical stabilizer, add some some canvas strips and glue for protection and rigidness, and glue the tail section on to the tail boom.


Put a nut on a string and run it trough the tail boom and out the prepared hole in the fuselage. Then tie the servo leads to the string and pull them trough the boom in to the fuselage. Once installed, solder on a servo connectors.


To secure the servo leads and connectors, take a bottle cork, cut it in half, hollow it and glue the wires inside of it. Then just jam it in to the hole.


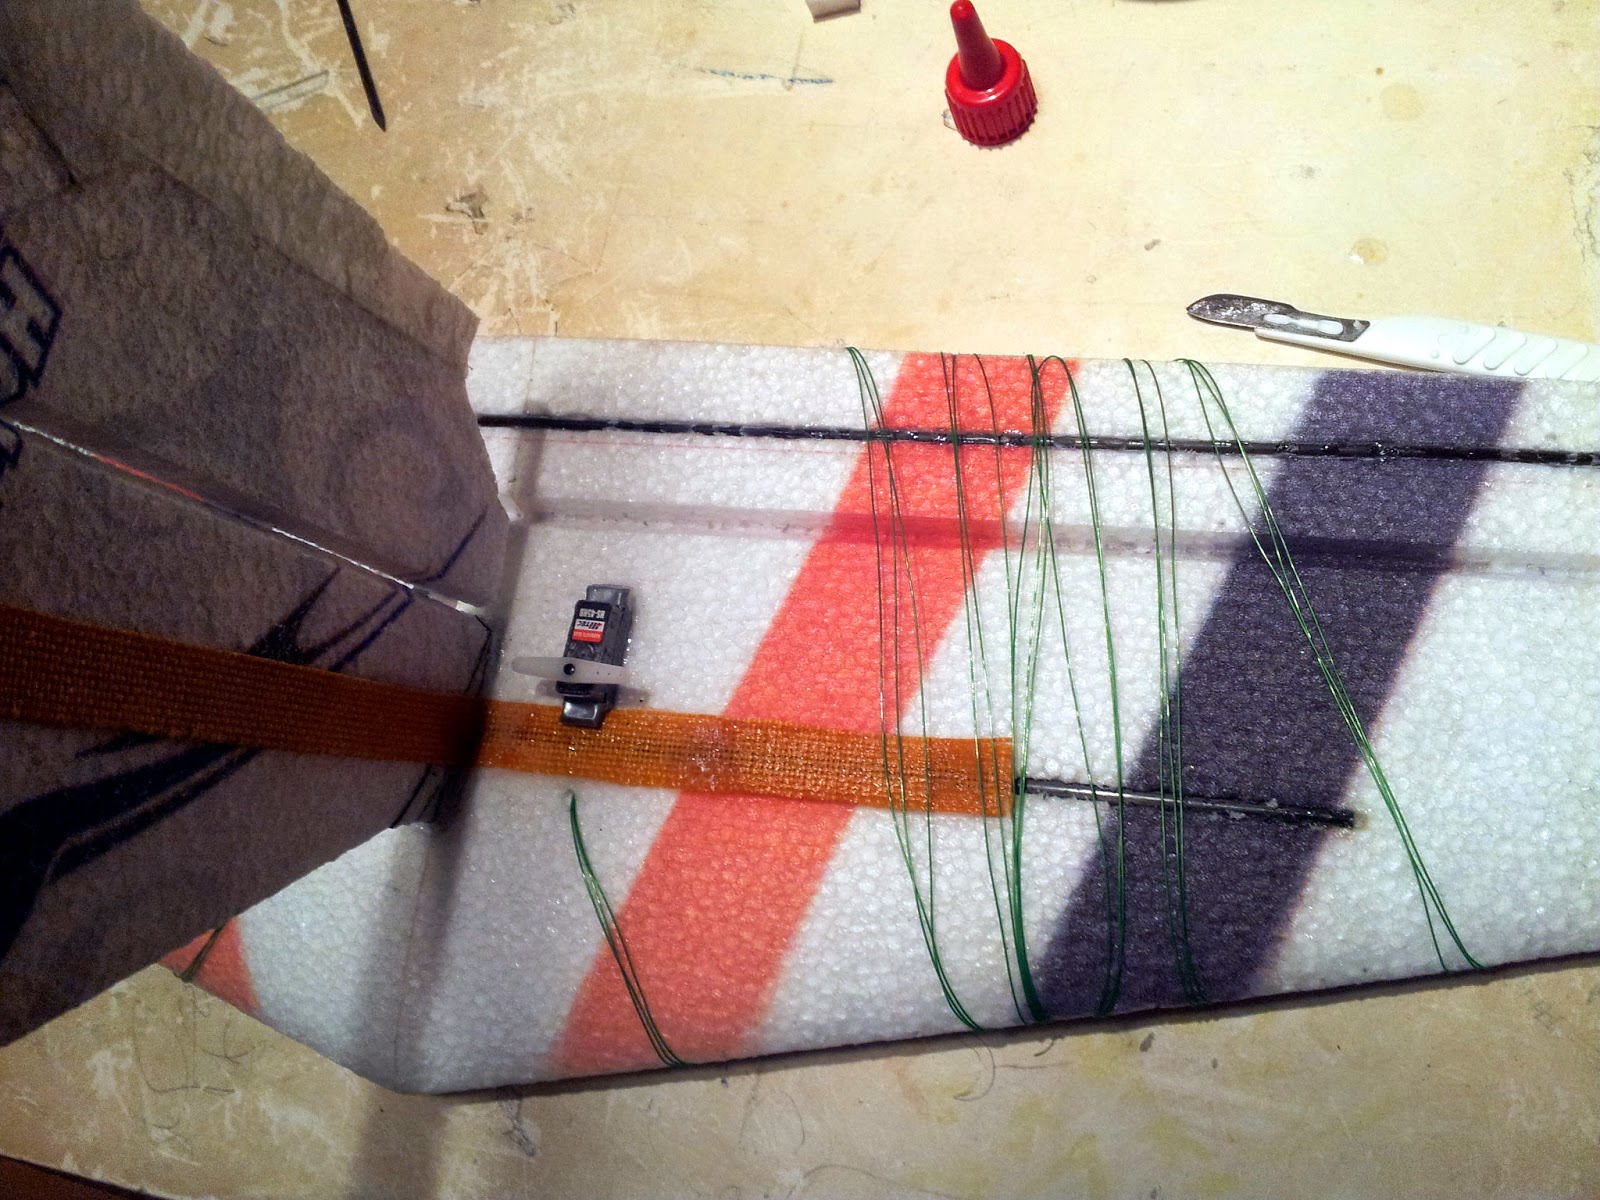
Once again fit everything, then cut the ailerons on the wings turning them in to ailerons and flaps.


Extend some more leads of high torque servos (just in case) and glue them in to the wing.


To reinforce and lift the motor mount to create enough of a clearance for a bigger prop, cut out and glue a bigger wooden piece.


Then drill the holes in the appropriate places, color it and mount the motor.


Now just add the batteries, wire everything up, check for center of gravity and we're ready for the maiden flight.


Tuesday, February 25, 2014

The AutoPilot lives

Time to tackle this one!

This time with control loops on all axis, auto throttle to help with climb and ascend, and even interaction between roll and yaw.

And here we can observe our happy little autopilot flying it's first virtual mission (where W1 is set at 300 meters (with a forced left turn) and W2 & W3 are set at 400 meters (with the turn over the closest distance)):


The control loops are still uncalibrated, with P.I.D. values based on trial and error so far, which results in unwanted oscillation between maneuvers. But that's an optimization problem for later.

And while we're at it, let's design some sort of description structure for mission planning that can be uploaded to the autopilot. Awesome design documents for the win :P


Sunday, April 21, 2013

P.I.D. Stands for Proportional Integral Derivative (Controller)

Now that we can see what it's going on with the collected data, we can focus on the "intelligent" part of the autopilot.

So off to study control systems we go. For the beginning, the simplest implementation of a PID controller. And the key word is simple. No boundary checking, trial and error parameters, ...

And it didn't work half that bad (running FlightGear and recording the flight did introduce some lag and jitter):


For the development and tests: FlightGear with Rascal110-JSBSim aircraft, connected trough wireless network to the Samsung Galaxy S2 which is running the autopilot software.

The flight: starting the engine, controlling the plane with a mouse while taking off, banking to the left side, turning on the autopilot, the plane levels (some oscillation because of the lag introduced with running the simulator and recording it), using just the rudder to turn right, plane turns right while being stabilized with no roll, reset all controlling surfaces to default position, using just the rudder to turn left, plane turns left while being stabilized with no roll, reset all controlling surfaces to default position, fly straight, turn off autopilot, plane "crashes".


And that's how the flight looked, location, speed, and altitude (yes, the "heat map" still needs a legend, it's a work in progress).

Now, just fro fun, let's look at some graphs, these are always fun:


Time stamps of network packets with data received. Almost completely linear, with some variation. In some other tests, where the variation was significant, the autopilot would fly smooth, then correct violently (error being calculated was wrong due to incorrect timing of the event and the received data stamp), oscillate a bit and the settle again.


Roll graph: showing target attitude, current attitude and error.


Roll graph: showing the PID controller output, not limited to reasonable boundary’s.


Roll graph: showing integral part of the error, not very useful  for calculating offsets at the moment since it's not limited to reasonable boundary’s.


Roll graph: derivative part of the error, showing where were the quickest changes.

Roll stabilization was computed with these weights: Kp=0.1111, Ki=0.0, Kd=0.5


Pitch graph: showing target attitude, current attitude and error.


Pitch graph: showing the PID controller output, not limited to reasonable boundary’s. Zooming closer to the latter part, there would be visible some minor oscillation, as is visible in the previous graph.


Pitch graph: showing integral part of the error, not very useful  for calculating offsets at the moment since it's not limited to reasonable boundary’s.


Roll graph: derivative part of the error, showing where were the quickest changes.

Roll stabilization was computed with these weights: Kp=-0.019, Ki=-0.025, Kd=0.75

It's not perfect, but it's a start.