Only one way to find out, which means it's time for some more modifications!
First we determine the location of the camera mount on/in the fuselage:
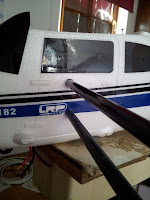
Keep in mind where the center of gravity will be once the cameras are on the plane, then cut the carbon tubing holder size box on one side and appropriate placed holes on the other side of the plane.
Center it just right and it looks like this:
Now that we have the camera holder in place it's time to use the camera holder mounts we prepared and printed.
The mounts will hold the holder to the wing so it wont move about and also to redistribute the weight a bit more evenly:
First locate and mark a good spot, close enough that will hold the stand and leave enough room so the cameras could be put on, but still far enough so the stand can be slide in and out.
Then mark the spot, carve it out (watch out for the servo wires) and protect the servo wires with wax (so once everything is coved with glue and the plane is beyond repair we can remove the servos without it's wires being glued).
Once that is done, drill appropriate holes in to the mounts so the fit around the carbon tube holding the wing, fit them inside the holes and drown them in glue.
After some time when the glue is set, we have out wings with mounts that look like this:
To fully assemble and disassemble the plane now is a whole process, but it's worth it when the end result looks like this:
Will it fly? Only one way to find out :P


No comments:
Post a Comment